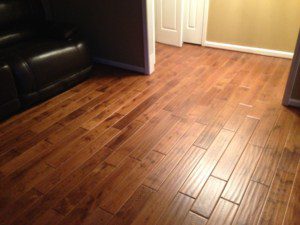
When you’re looking to update the flooring in your home, laminate flooring is a popular and affordable option that offers a range of benefits. It is durable and easy to maintain. Laminate is also very versatile with nearly limitless design options. This flooring has become a favorite choice among homeowners. However, before diving into a laminate flooring installation, it’s important to understand the process to make sure that you get a great outcome. In this ultimate guide to laminate flooring installation, we’ll cover everything you need to know, from preparing your subfloor to laying and finishing your new floors. So, whether you’re a seasoned DIYer or a beginner, this guide will provide you with the knowledge and confidence to tackle your own laminate flooring installation.
Preparation
Before you begin installing your laminate flooring, it’s essential to prepare the area. Proper Preparation Prevents Poor Performance. First, remove any existing flooring, baseboards, and any other materials that would prevent installation. Next, inspect the subfloor for any damage or unevenness. If there are any issues, they must be addressed before moving forward with the installation. The subfloor should be clean, dry, and level to ensure that your laminate flooring sits evenly and doesn’t shift over time. Additionally, you will need an underlayment to provide a smooth surface to give a bit of insulation and reduce noise. Taking the time to prepare the space properly will ensure that your laminate flooring will last for years.
Subfloor
Subfloor preparation is a critical step in the process. Before beginning, it’s important to ensure that the subfloor is structurally sound and free of any damage. This means addressing any cracks, holes, or bumps. If there are any areas that are particularly uneven, you might have to use a self-leveling compound to even everything out. In addition, it’s important to make sure that the subfloor is clean and free of debris. Vacuuming and sweeping the area before installation can help ensure that the laminate flooring will lay flat and securely. Take great care in preparing your subfloor. It will help ensure that the finished floor looks fantastic.
Underlayment
Underlayment is a layer of material that is placed between the subfloor and the laminate flooring during installation. It helps to provide a smooth, level surface for the laminate flooring and to absorb sound and reduce noise. Underlayment also provides a little bit of give under the laminate. Your knees will appreciate that cushioning over time. There are a variety of underlayment materials available. Such as foam, cork, or rubber. The choice of underlayment will depend on several factors, including the subfloor material, the type of laminate flooring being installed, and the desired level of sound absorption.
Installing the Laminate Flooring
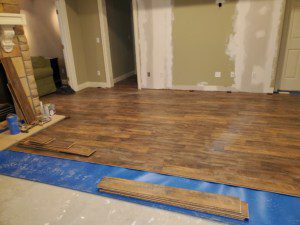
Once the subfloor and underlayment are prepared, it’s time to start laying the laminate. The installation process typically involves snapping the laminate planks together, starting from one corner of the room and working your way across the space. It’s important to maintain a consistent gap around the perimeter of the room to allow for expansion and contraction of the floating floor. Use a mallet to tap the planks into place and ensure a tight fit. Depending on the details of your flooring, there may be additional steps required, such as gluing the planks together or using special tools for locking the planks in place. Be sure to follow the manufacturer’s instructions carefully to ensure a successful installation.
Working With Uneven Walls and Obstructions
During laminate flooring installation, you may encounter uneven walls and obstructions such as doorways, pipes, a fireplace, or built-in cabinets. These areas can be challenging to work around but can be addressed with a few techniques. One common method is to scribe the laminate planks to fit the shape of the wall or obstruction. This involves tracing the contours of the wall or obstruction onto the plank and then cutting it to fit. Another option is to use a jigsaw or sawzall to make cuts in the planks to fit around obstructions.
Trim and Transitions
Replacing trim and transitions is an important step in the final stages of installation. Baseboards and quarter-round will need to be replaced once the installation is complete. Depending on the condition of the trim you removed, you may choose to reinstall it, or cut new trim. Quarter round is very important. It provides a finished look to your new floors and conceals any gaps around the perimeter of the room. Remember, you need that gap so that the floating floor can expand without buckling.
Additionally, transition strips should be installed in areas where the laminate meets a different type of flooring. This occurs in doorways, but also in large single rooms that serve two purposes. Such as a living room and dining room that have no wall between them. Transition strips come in a variety of materials, and are available in different styles to match your decor. Properly replacing trim and transitions will help to complete the look of your new laminate flooring and create a seamless transition between rooms.
Finishing Up
After all the trim is fastened into place, it’s time to add the finishing touches to your new floors. One essential step is to thoroughly clean the floors to remove any dust, debris, or adhesive that may have accumulated during installation. Consider adding rugs or runners to high-traffic areas to help protect the flooring and reduce wear and tear. Finally, maintain your new laminate flooring by regularly cleaning it with a manufacturer-approved cleaner and avoiding excessive moisture or abrasion. Once you’ve cleaned up, you can move your furniture and furnishings back into your newly renovated room. But keep in mind that if you use an adhesive during installation, it may need to dry for 24-48 hours. Wait until is set before moving back in.
There are many laminate flooring options, and many steps to complete for an installation. If you feel that you should call in an expert, please contact us for a free evaluation.


