Staggered Vinyl Plank Flooring
1. Measure the room and calculate the amount of vinyl planks needed. You can get a rough estimate on the square footage needed by multiplying the length of the room by the width, but obstacles must be accounted for. Make sure to purchase enough planks to allow for staggering, as well as any cutting that may be necessary to fit around obstacles. It is also a good idea to order a few extra planks in case of any mistakes or damage during installation.
2. Prepare the subfloor before beginning the installation. Remove any obstructions. The subfloor should be clean, dry, and level. If the subfloor is not level, use a self-leveling compound to smooth out any uneven areas. Any severely uneven areas may need to be shimmed, or require further repair before installing your flooring. Keep in mind that if you are installing a floating floor, this may hide a slightly uneven subfloor. But a more severe uneven subfloor could make your floating vinyl planks buckle and be noisy.
3. When you purchase your vinyl, be sure to store them indoors and let them acclimate for 72 hours before removing them from their packaging. This ensures that temperature change is gradual and your planks stay flat and straight.
4.When you unbox your vinyl, mix up all of the planks from various boxes. This ensures that the shades and patterns of the planks are mixed together, and look consistent once they’re done. Manufacturers often group the same shades and patterns together. Without mixing them, all of the same shades and patterns will be laid together and it will be noticeable.
5. Start by laying the first row of planks along the longest straight wall in the room. This will help ensure that the planks are straight and that the staggering is even.
6. Be sure to leave a ¼” space along the wall for expansion. Without this gap, your floor will buckle. The flooring expands and contracts with temperature changes and needs room to move.
7. When laying the first row of planks, be sure to offset the ends of the planks by at least 6 inches. This will create a staggered pattern that looks natural. If the room is large and you are using a lot of planks, you may need to increase the offset to 8 inches or more to create a more balanced look.
8. When laying subsequent rows, be sure to match the pattern of the first row as closely as possible. This will help create a consistent and cohesive look for the floor.
Don’t Stagger When Staggering Your Vinyl Plank
9. Use a tapping block and a rubber mallet to help secure the planks in place. The tapping block will help prevent damage to the planks, while the rubber mallet will provide enough force to securely attach the planks.
10. As you work, check to make sure that the planks are straight and that the staggering looks even. If necessary, use a saw or a utility knife to trim any planks that are not fitting properly. Be sure to use a respirator while sawing. You don’t want to inhale the particulate that comes from any construction materials.
11. When you reach the edges of the room, you may need to cut the planks to fit around obstacles such as doorways or cabinets. Use a saw and carefully trim the planks to size. A utility knife can also be used in a pinch.
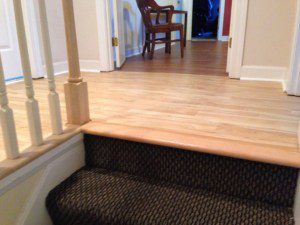
12. If you are transitioning from one type of flooring to another, such as from vinyl plank to carpet, you will need to use a transition strip. This strip will cover the gap between the two types of flooring and help to create a seamless transition. Leave a gap for your transition strip to fit and fasten it.
13. Once all of the planks are in place, use a roller or another object to roll over the floor and ensure that the planks are securely attached. If you don’t have a roller, walking over all areas of the floor may suffice.
14. If your vinyl plank flooring has a click-and-lock system, be sure to follow the manufacturer’s instructions for locking the planks together. This will help ensure that the floor is secure and that the planks do not come apart over time.
Be Safe
15. Be aware of any potential dangers when installing vinyl plank flooring. Wear protective gear, such as goggles and gloves, to prevent injury. Wear a respirator to protect your lungs from dust and other particles. Make sure to follow the manufacturer’s instructions carefully to avoid any accidents. It is also a good idea to have a partner to help with the installation, as the planks can be heavy and awkward to handle on your own.
If you need further assistance installing your vinyl plank flooring, contact Flooring Masters & Professional Remodelers. We offer top-notch flooring installation services that will enhance your homes aesthetic value and also its function. Contact us now so that we can start brainstorming!